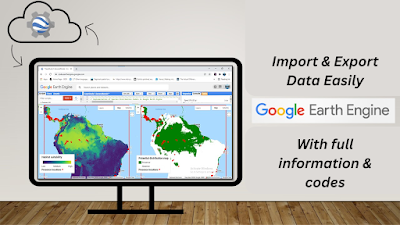
Google Earth Engine (GEE) is a powerful cloud platform for geospatial analysis. In this guide, I’ll explain how to use it step by step, especially how to import and export data.
🔐 1. Sign Up and Access Code Editor
-
First, sign up here: https://earthengine.google.com/signup
-
After approval, open the Code Editor:
👉 https://code.earthengine.google.com/
💻 2. Understand the Code Editor Interface
-
Script Panel – Write your code
-
Map Panel – View your outputs
-
Console – Shows messages or errors
-
Inspector – Click to inspect pixel values
-
Assets Panel – Upload and access your files
📥 3. How to Import Data in Google Earth Engine
A. Import Built-in Datasets (Like Landsat or Sentinel)
var image = ee.ImageCollection("COPERNICUS/S2")
              .filterBounds(ee.Geometry.Point(73.0551, 33.6844))
              .filterDate('2021-01-01', '2021-12-31')
              .median();

Map.centerObject(image, 9);
Map.addLayer(image, {bands: ['B4', 'B3', 'B2'], max: 3000}, 'Sentinel Image');
B. Upload Your Own Data (Shapefile or CSV)
-
In the Assets tab, click “NEW” > Table upload (for shapefile or CSV)
-
Upload your zipped shapefile (including
.shp,.dbf,.shx,.prj) -
After uploading, click “Import”
-
Use in code like this:
var shapefile = ee.FeatureCollection("users/your_username/your_asset_name");
Map.addLayer(shapefile, {}, "My Shapefile");
💾 4. How to Export Data from GEE
A. Export Raster Image (GeoTIFF format)
Export.image.toDrive({
  image: image.select('B4'), // or NDVI, or any other band
  description: 'SentinelBand4',
  scale: 10,
  region: shapefile.geometry(),
  maxPixels: 1e13
});
B. Export Vector Data (Shapefile or CSV)
Export.table.toDrive({
  collection: shapefile,
  description: 'Exported_Shapefile',
  fileFormat: 'SHP' // or 'CSV'
});
🔔 Note: Your data will be saved to Google Drive, and you can download it from there.
🧪 Bonus Example: NDVI Calculation & Export
// NDVI = (NIR - Red) / (NIR + Red)
var ndvi = image.normalizedDifference(['B8', 'B4']).rename('NDVI');

Map.addLayer(ndvi, {min: 0, max: 1, palette: ['white', 'green']}, 'NDVI');

Export.image.toDrive({
  image: ndvi,
  description: 'NDVI_Image',
  scale: 10,
  region: shapefile.geometry(),
  maxPixels: 1e13
});
📌 Summary Table
| Task | Code/Method |
|---|---|
| Import satellite data | ee.ImageCollection() |
| Import shapefile/CSV | Upload to Assets |
| View on map | Map.addLayer() |
| Export raster | Export.image.toDrive() |
| Export shapefile/CSV | Export.table.toDrive() |
Read What is Google Earth Engine for more information about this!🚀
✅ Final Thoughts
Google Earth Engine makes remote sensing work easier and faster. With just a few lines of code, you can analyze massive datasets, visualize results, and export your outputs.
If you'd like a PDF guide, video tutorial, or full LULC classification workflow, just let me know in comment section—I’ll prepare it for you!


2 Comments
Good day please help me with the code for LULC and NDVI
ReplyDeleteI’ll soon be adding code for LULC and NDVI analysis using Google Earth Engine to my blog. Stay tuned!
Delete